Teensy
✓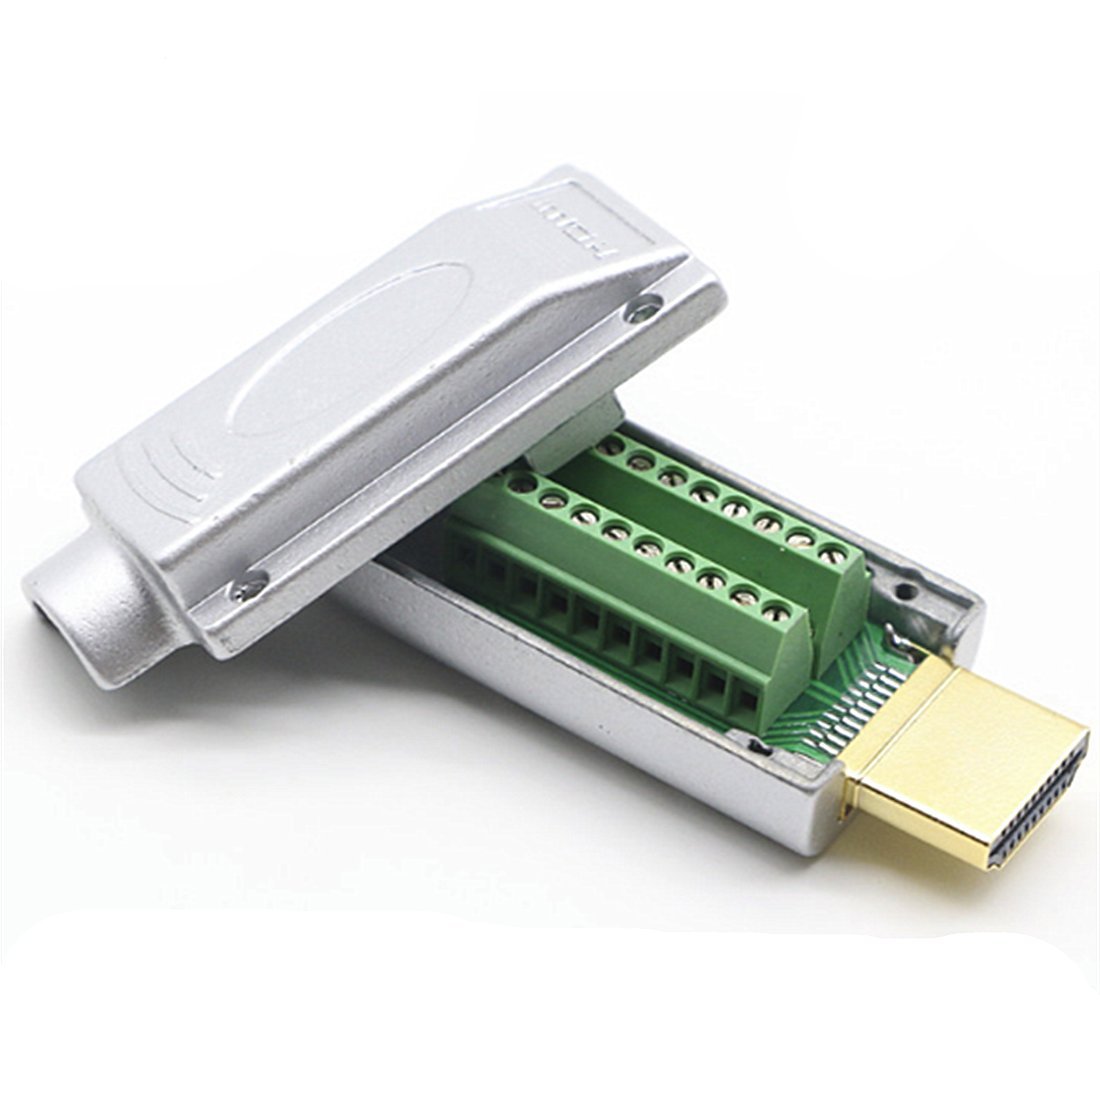
Notice: The connection method requires professional knowledge, and beginners should exercise caution when selecting. HDMI cables come with varying wiring plans. Due to differences among manufacturers, the wiring plans may vary, so it is advisable to consult the seller for details. If only one end needs modification, please use the original wiring structure. While wire colors may differ from various sources, ensure that both ends match the correct wiring structure. Before placing an order, familiarize yourself with the HDMI wiring plan. It is recommended to use a multimeter to decipher the colors! DIY HDMI Cable Repair Guide: 1. Using a Voltage Tester: - Set the voltage tester to resistance measurement mode, typically denoted by the ohm symbol (Ω). - Gently touch one probe to the pins of the new HDMI head and the other probe to each wire of the faulty cable. - When the voltage tester jumps or shows a low resistance value (close to zero ohms), you've found the corresponding wire. 2. Marking Wire Functions: - After identifying each wire's function using the voltage tester, mark or note down the corresponding functions for red, green, blue, white, and black. 3. Connecting to the New HDMI Head: - Examine the pins on the new HDMI head, ensuring you know the function of each pin. - Connect the red wire to the pin marked in red on the new head, and so on. - Use insulating tape or heat shrink tubing to insulate and secure each connection point. 4. Testing the Connection: - Insert the repaired HDMI head into the device, ensuring a secure connection. - Power on the device, check for a display, and ensure the signal transmission is normal. Throughout the process, ensure the device is in the off state for safety. Following these steps, you should successfully connect the repaired HDMI cable. Package Content : 1 x HDMI Connector
Customer reviews
10 Trustpilot reviews total, with 2 shown at a time.
I wrote to Bigamart's customer support and they accompanied the process of reshipping the item until it finally arrived. I felt a genuine effort to solve the problem till it was finally solved.
The package was here in Australia from England in a few days — so quick! Something was missing and they refunded it straight away. Pretty happy with these guys.
You might also like